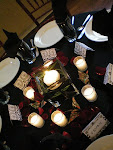
DIY can often mean significant savings in both budget and environmental impact but does require time - something not many couples have, which is why they hire a planner. Not all planners will do crafty things, so ask first before you start piling on the 'do-make' list.
Here are some useful sites:
Here's what nonsense I got up to for my wedding:
- Made paper art as part of the single card invitation. Can't tell you how much fun it is to wallow in wet paper sludge and make art with squirt bottles of coloured paper. Signed every invite which was affixed to archival paper - instant frameable stuff.
- Had my dress made by a local dressmaker. I wanted to wear green silk - handmade was the only option and it was the most cost-effective. Denver Fabrics Online provided the silk.
- Maid of Honour made the beautiful wee handbag that went with the dress.
- Made my necklace and bracelet from gold, pearls and garnet beads - to match the engagement ring, which was made by a family friend.
- Venue was perfect in it's Edwardian splendor so just added fall-coloured ivy collected that morning from the neighbourhood as tie-backs for the existing drapery.
- An intrepid bride's helper dressed up the frames of parental and grandparent bridal photos with red maple leaves between the glass and the photo.
- Made a guest book out of silk and a scrapbook and added blank pages for people to draw, colour and comment. Included a pile of markers, stickers and fun pens. The kids had a blast.
- Made programs - two to a sheet of 8.5x11 transparent paper, stamped the back with leaf stamp in copper ink.
- Made thank you cards with a stamp of a leaf skeleton, in keeping with the leaf embedded in each invitation.


No comments:
Post a Comment